Overview
The Bid Workspace is where you write, manage, and refine bid responses. It provides a structured environment for multi-section bids with AI assistance, word limit tracking, and quality review tools integrated into a single interface.
Creating a New Bid
There are two ways to create a bid in KimonBids:
From a Tender Record
- Find a tender on the Tenders page that you want to bid for
- Click Start Bid on the tender detail view
- KimonBids creates a new bid linked to that tender record, pre-populating buyer information, closing date, and contract value
From Scratch
- Click New Bid from the Bids navigation
- Enter a bid name and (optionally) link it to a tender
- Add sections manually or import criteria from an ITT document
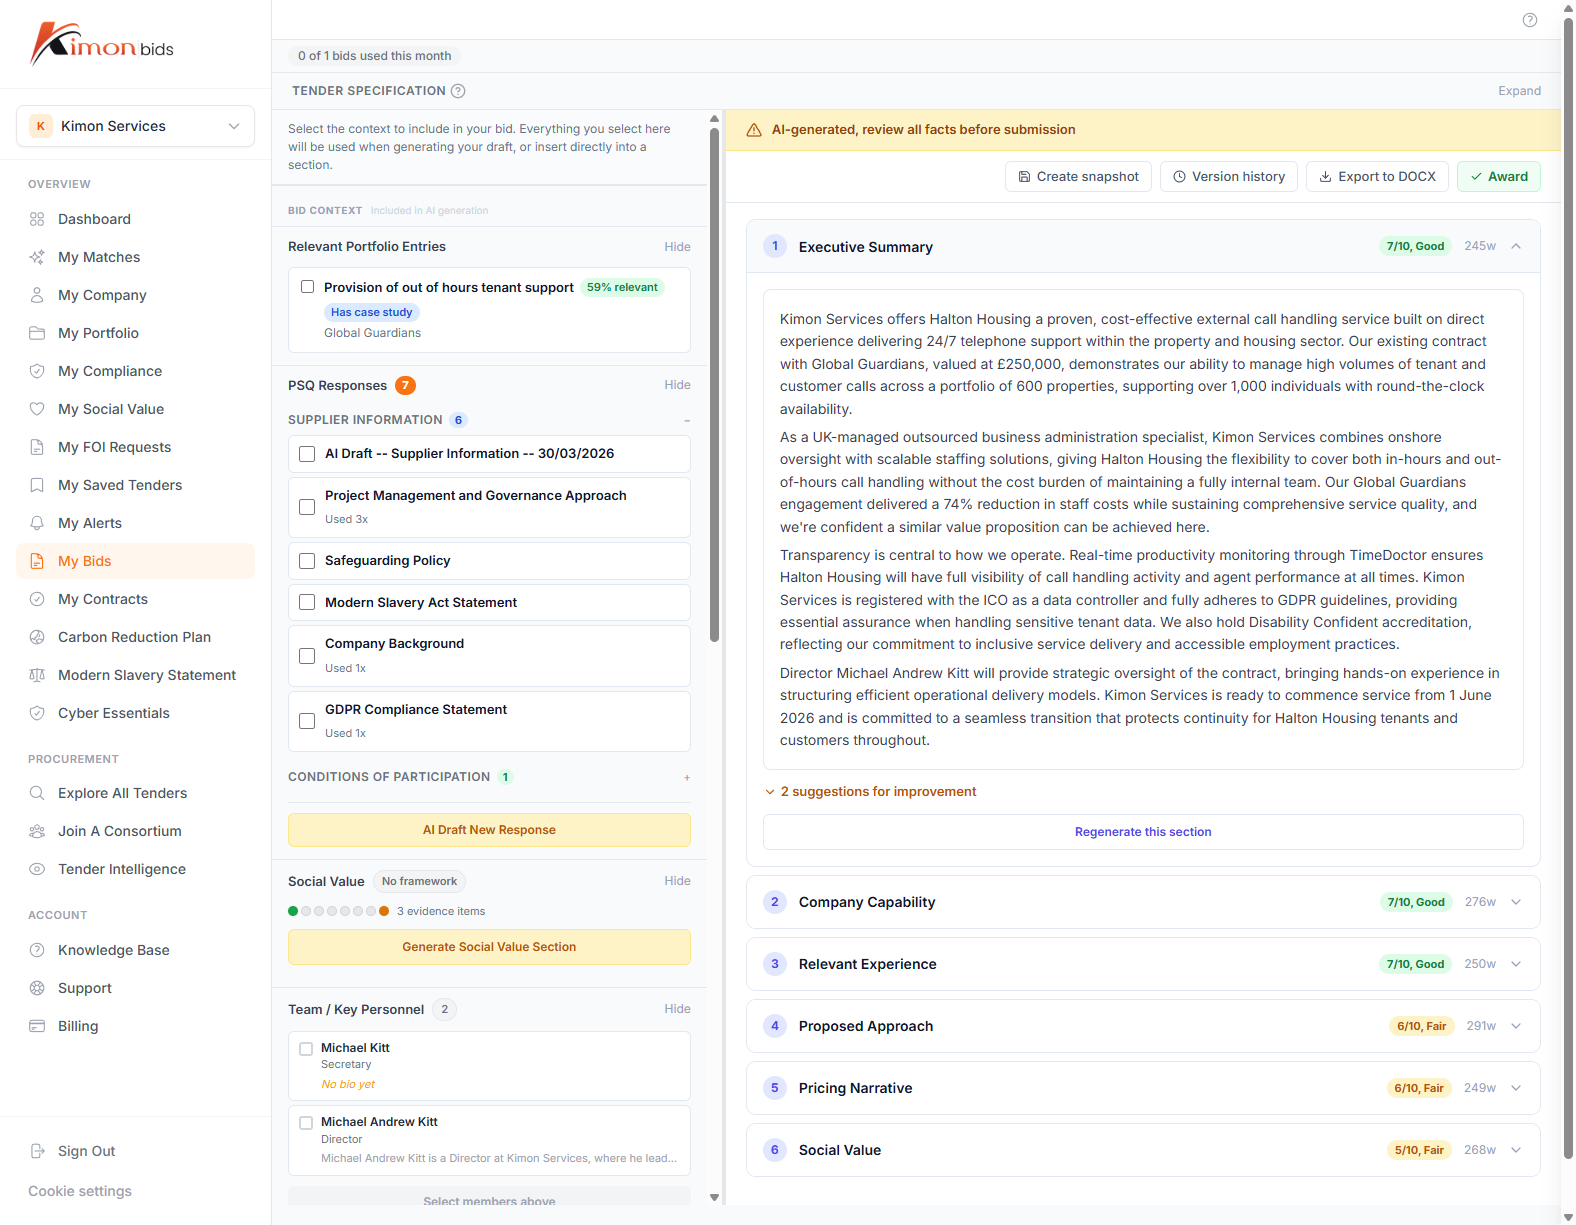
The Workspace Layout
The Bid Workspace is divided into panels:
Left panel -- Sections navigation Lists all sections in the bid. Each section shows:
- Section name
- Word count vs word limit (e.g. "483 / 500 words")
- Completion status indicator
Centre panel -- Editor Rich-text editor for writing and formatting your response. Supports headings, bullet lists, numbered lists, and bold/italic text.
Right panel -- Context and tools
- Tender details (closing date, buyer, contract value)
- AI tools panel (Generate, Review)
- Attachments and evidence files
Managing Sections
Adding a Section
Click + Add Section at the bottom of the sections list. Enter:
- Section name (e.g. "Technical Approach")
- Word limit (required by most buyers)
- Scoring weight (optional -- helps you prioritise effort)
Importing Sections from an ITT
If you have an ITT (Invitation to Tender) document from the buyer, upload it to extract scored criteria automatically:
- Click Import from ITT in the sections panel
- Upload the ITT PDF or Word document
- KimonBids extracts section headings, word limits, and scoring weights from the document
- Review the imported sections and adjust if needed
This saves significant time compared to manually entering criteria from a lengthy ITT document.
Note: Extraction quality depends on how well-structured the ITT document is. Always review extracted sections against the source document before proceeding.
Reordering Sections
Drag sections in the left panel to reorder them. The order in the workspace is for your own organisation -- it does not affect the order of your submission document.
Deleting a Section
Right-click a section or use the section menu (three dots) and select Delete. You will be asked to confirm before the section is permanently removed.
Writing Your Response
Working in the Editor
Click a section in the left panel to open it in the editor. The editor supports:
- Headings (H2, H3) for structured responses
- Bullet and numbered lists for clarity
- Bold and italic for emphasis
- Paste from Word or Google Docs (formatting is preserved where possible)
Tip: Government evaluators often score against specific sub-criteria. Use headings within your section to address each sub-criterion explicitly, making it easy for the evaluator to map your response to the marking framework.
Word Count Tracking
The word count updates in real time as you type. The section indicator in the left panel changes colour:
- Grey -- Under limit, room to expand
- Green -- Within 10% of the word limit (good coverage)
- Amber -- Over 90% of limit (approaching)
- Red -- Over word limit (exceeded)
Most government evaluators will disregard text beyond the stated word limit. Stay within the limit.
AI-Assisted Drafting
Generating a Draft Response
KimonBids can generate a first-draft response for any section using AI. The draft is based on:
- The section name and any criteria extracted from the ITT
- Your company profile (sectors, certifications, description)
- The tender context (buyer, contract description, CPV codes)
To generate a draft:
- Open a section in the editor
- Click Generate in the right panel
- Select generation scope: Full Section, Opening Paragraph, or Bullet Points
- Click Generate Draft
The draft appears in the editor. It is a starting point -- always review and edit before submitting.
Editing Generated Content
Generated drafts are inserted as editable text. You should:
- Verify all factual claims against your actual capabilities
- Add specific examples, case studies, and evidence
- Replace any placeholder text (marked with square brackets)
- Tailor the tone to match the buyer's language in the ITT
Important: AI-generated content should not be submitted without human review and editing. Evaluators recognise generic AI responses. Personalise with real evidence and specific project examples.
Regenerating Sections
If you want to try a different approach, click Regenerate to produce a new draft. Previous drafts are discarded (the editor content is replaced). If you want to keep a version, copy it to a separate document first.
Working with Multiple Sections
For complex bids with many sections, use the following workflow:
- Import the ITT to create all sections at once
- Generate first drafts for all sections in sequence
- Review and score each draft against your notes
- Edit in priority order -- highest-weighted sections first
- Run AI review when complete (see AI Review Explained)
Attaching Evidence and Documents
Some sections require supporting documents (case studies, CVs, certificates). To attach files:
- Click Attachments in the right panel
- Upload files (PDF, Word, Excel, images)
- Files are stored against the bid and can be referenced in your narrative
Compliance certificates from your compliance library can be attached directly without re-uploading.
Saving and Version History
The Bid Workspace auto-saves every 30 seconds. You will see a "Saved" indicator in the header when the latest changes are stored.
To view version history, click the clock icon in the top right of the editor. You can review and restore any previous version.
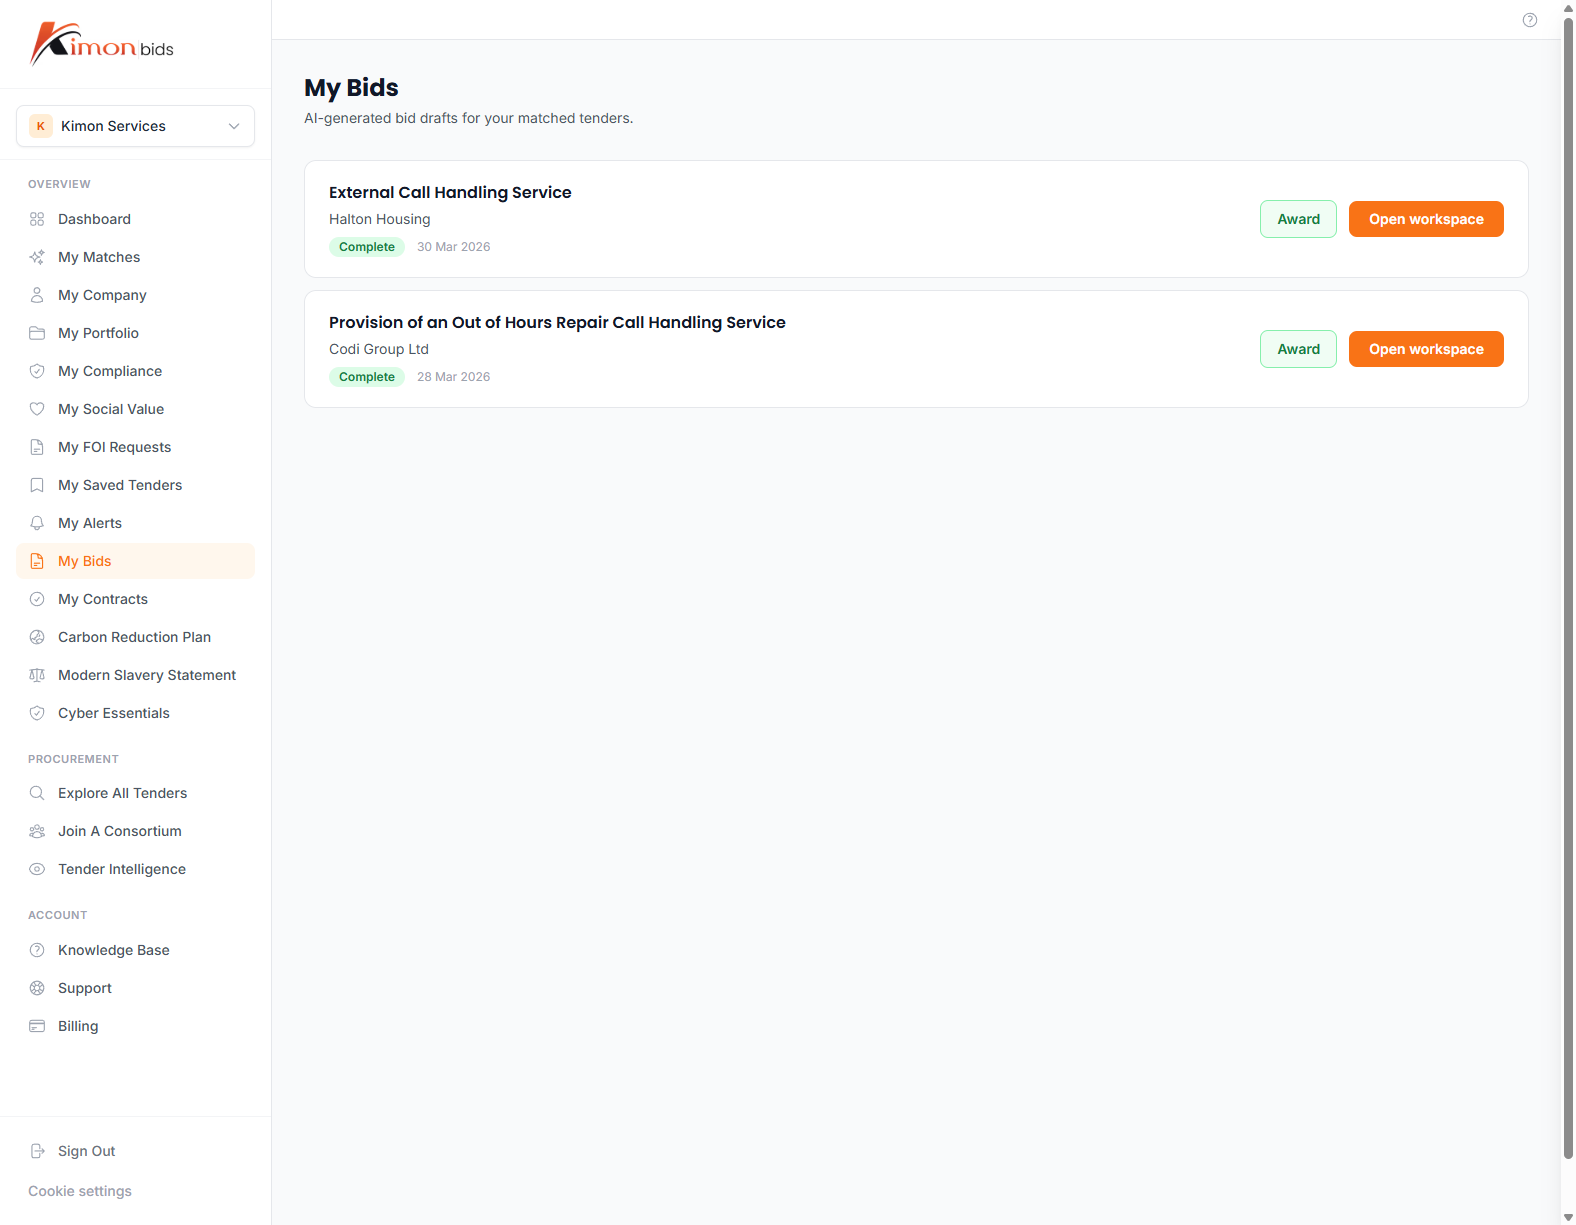
Marking a Bid as Complete
When you are satisfied with all sections, click Mark as Complete in the bid header. This:
- Flags the bid as submission-ready in your dashboard
- Prevents accidental edits (you can unmark it if needed)
- Records the completion timestamp for your pipeline audit trail
Downloading Your Bid
To download your bid as a Word document for submission:
- Click Export in the bid header
- Select Word (.docx) format
- Choose formatting options (font, margins, cover page)
- Download and review the formatted document before submitting to the buyer portal
Note: Always proofread the exported document. Formatting in Word may differ slightly from the on-screen editor view.
